Types and methods of installing solar panels
Solar panels are a good solution for both a private house and a summer cottage. At the summer cottage, you do not have to supply electricity, you can put several panels and provide the house with energy. Installing solar panels requires certain knowledge and skills, but if you wish, everyone can understand the work. The main thing is to study the features of installation and choose the equipment for your needs.
Places for installation
When choosing a location for solar panels, there are several important criteria to consider. Only then can you determine where it is best to place the modules on the site so that they give the best effect. The main recommendations are:
- For the northern hemisphere, you need to orient the solar panels to the south, for the southern - vice versa. This is the ideal position, but if it is not possible to position the slope due south, the southeast or southwest will do.
- The slope also needs to be selected depending on the region.The simplest option that experts advise is that the angle of inclination should be approximately equal to the latitude at which the house is located. For example, Moscow is located at 55 latitude, but it is not always possible to raise the modules to such an angle, so the maximum possible value is taken.
- You can put solar panels only where there is no shade. If the surface is shaded, the work efficiency will be low. Trees and other plants can be removed, but if buildings interfere, then the problem will not be solved.
- Choose the option that is easy to maintain. The batteries themselves do not need special care, but the surface needs to be washed several times a season. From dust and pollution efficiency decreases. It is also necessary to provide access to all connections and modules, they also need to be checked periodically.
- Observe the permissible load on the roof if the system is to be located there. Most often, there are no problems, since the batteries weigh a little, but if the rafter system is old and the roof is not very reliable, you need to either redo it or strengthen it.
For maximum effect, it is desirable to change the angle of the batteries. For summer, increase by 12 degrees, and for winter, reduce by the same amount.
There are several options for mounting panels, each of them has its own characteristics. It is better to think over this point in advance and evaluate the complexity of the implementation of the chosen technology. Use the method that requires less effort and cost. The main methods are:
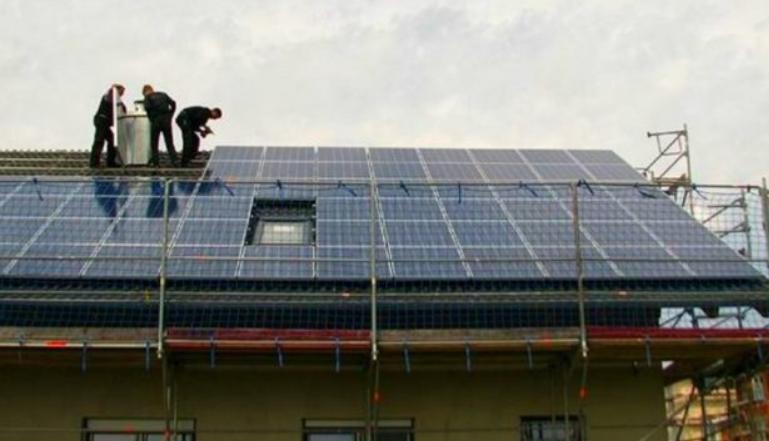
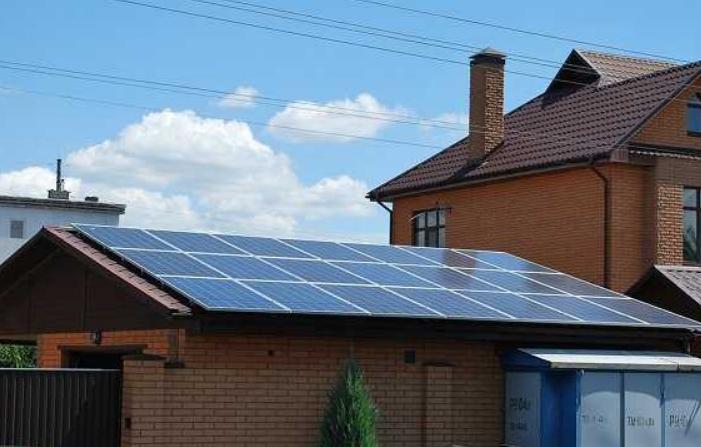
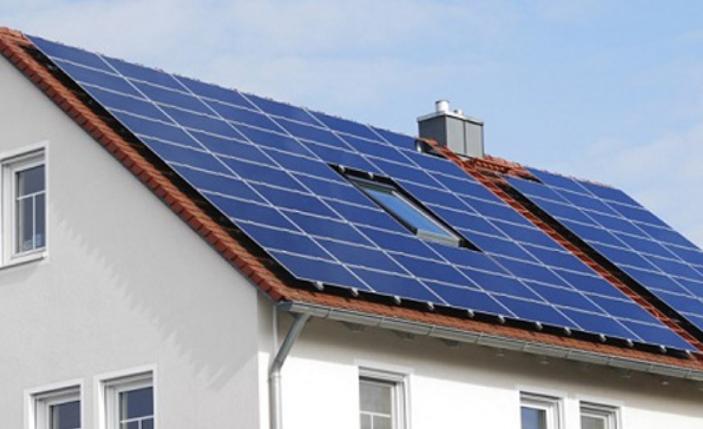
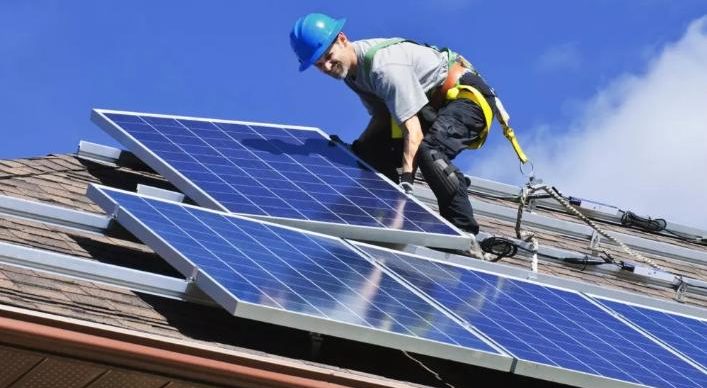
- Installation of solar panels on a pitched roof house or other building. The most common solution that saves space and reduces the chance of accidental damage.At the same time, electricity is supplied directly to the building, which increases the efficiency of the system. For all types of roofing, there are ready-made fasteners, so there will be no problems with installation.
![harder on steep slopes]() Mounting on steep slopes is more difficult, but the efficiency is much higher.
Mounting on steep slopes is more difficult, but the efficiency is much higher. - Flat roofs. They are less common, but if you need to install solar panels on such a surface, most often a frame is made to provide at least a small angle of inclination. This will increase the efficiency of the system and simplify its maintenance.
- Wall mounting is an option that is rarely used due to the complexity of installation and the large area of \u200b\u200bthe elements. In this case, you must first make a carrier system, and attach solar panels to it.
- When the modules are located on the ground, a frame is usually made with a suitable angle and they are installed in several rows. In this case, you can make the system both fixed and swivel to adjust to the sun, this will increase the efficiency of power generation.
You can use two installation options, it is not necessary to put all the solar panels in one place.
It will be useful to read: We install 300 solar panels on our own
Place for the inverter
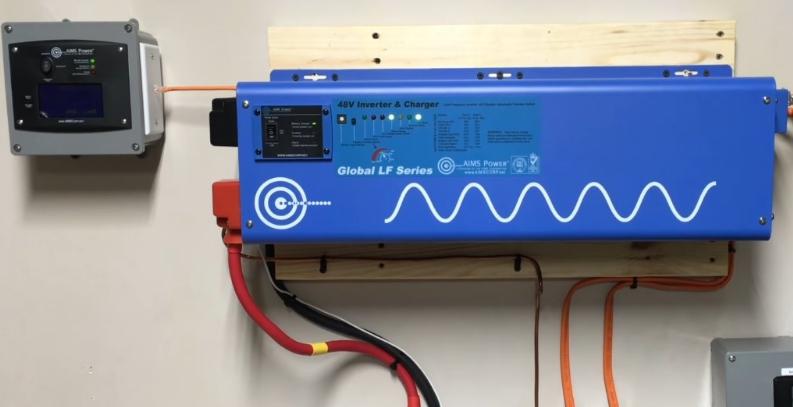
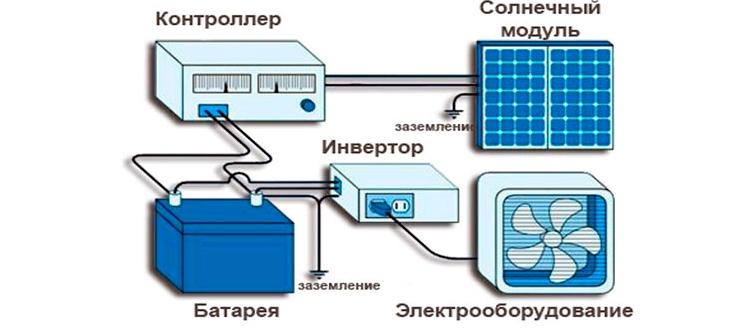
This equipment converts direct current from solar panels into alternating current, which is used by all household appliances. It should be selected based on their characteristics of the panels. Everything is calculated in the project, so you need to buy an option with the right characteristics. When choosing a location, consider the following:
- The closer the converter is to the current source, the less energy is lost during transmission and the more efficient the system works. Therefore, if possible, it should be located as close as possible to the connection point.
- When installing panels on roof or the wall of the house without using batteries, it is best to put the inverter in the attic. The temperature there is suitable for equipment, it is better to prepare the place in advance, provide good ventilation to prevent overheating in summer.
- Ensure the convenience of inverter maintenance. Do not put it in places with limited access, since from time to time you need to clean the case from dust and check the connections. In order not to constantly monitor the readings, it is better to choose models with a wireless module so that the data is transmitted to the Internet and you can view them via a smartphone or computer.
The main thing is not to put the equipment too far and protect it from adverse effects. Follow the manufacturer's installation instructions to rule out any problems.
Mounting methods
It is worth considering the most common installation methods on the ground and on the roof. All options for the ground are suitable for a flat roof, with the difference that you first need to put the brackets. There are several methods, each with its own characteristics:
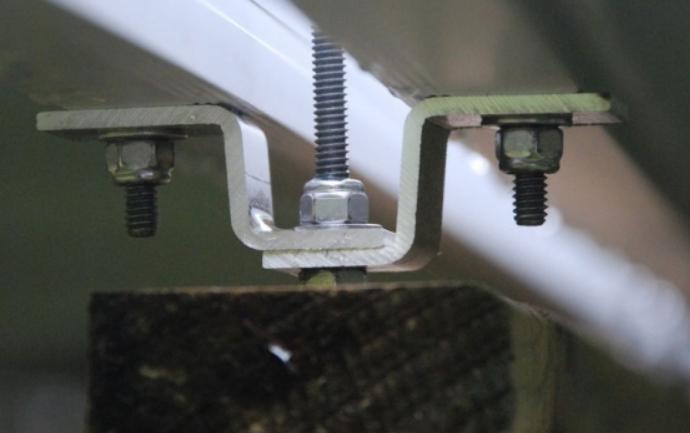
- A ground-mounted timber frame is the simplest solution. First you need to choose the right direction, then think about the method of attachment. You can dig pillars into the ground, or you can put foundation blocks and install the structure on them. It is better to use bars that have been pre-treated with a protective compound. It is easier to fasten the panels with the help of aluminum corners and threaded studs, these elements at the same time serve as grounding. A sample is shown in the photo below.
- Wooden frame with aluminum rails.Due to the fact that the solar panels are mounted using special fasteners, the work is simplified, and the quality is improved. The structure is assembled in the same way as described above, but guides are placed on the installation side of the panels, on which the energy collectors are located.
![Mounting on a wooden structure.]() Mounting solar panels on a wooden structure.
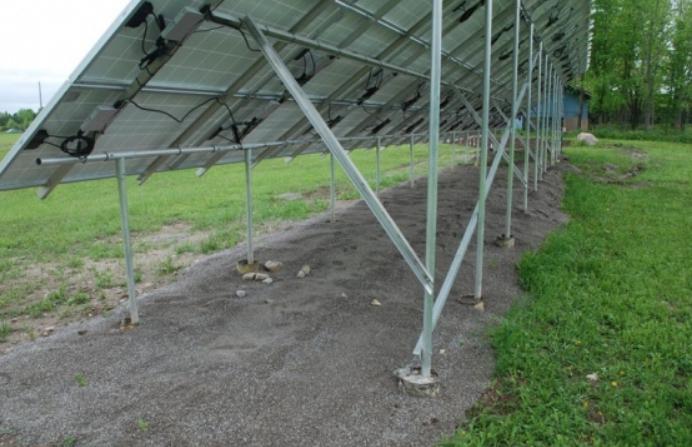
Mounting solar panels on a wooden structure. - Metal construction. For manufacturing, it is easiest to use pipes (both round and profiled) or a corner. The frame is welded so that it is strong and does not break under load, brackets for guides are attached from the outside. This type is also good because the frame simultaneously serves as a ground.
![For strength, the metal frame should be reinforced with diagonal braces.]() For strength, the metal frame should be reinforced with diagonal braces.
For strength, the metal frame should be reinforced with diagonal braces. - On roofs made of classic or flexible tiles, you must first install brackets that go under the roofing material. They do not violate the integrity of the roof. Aluminum rails are attached to the brackets, then the solar panels are mounted. For this, special screw clamps are used, 4-6 pieces for each element.
- If there is a metal tile or corrugated board on the roof, special fasteners should be used. They are screwed through the metal with special screws, the attachment point is closed with a washer with a rubber layer so that water does not enter the hole. Further work is carried out as usual - guides are placed and panels are attached.
When attaching the panels, check the reliability, they should not hang out and move.
Battery connection
To create an autonomous network in the house, you need to properly connect the solar panels. Work is within the power of any person who is at least a little versed in the topic and knows how to use a screwdriver.Observe the following instructions:
- Even at the stage of mounting solar panels, you need to lay the cable and securely connect it to the modules, following the diagram. Think about how to properly place the wiring, if necessary, use a corrugated non-flammable sleeve.
- Carefully study the instructions that come with the controller. This unit not only regulates the charging of the batteries, but also monitors their condition and stops the power supply when they are fully charged. Understand the connection contacts so as not to confuse anything.
- First connect the controller to the battery pack. This is necessary in order for him to monitor the equipment. For connection, use the first pair of terminals.
- Next, you need to connect the cable coming from the solar panels to the second pair of terminals. The last to be connected is low-voltage night lighting, and the third pair of terminals is intended for it.
- The inverter converts direct current into alternating current for the normal operation of household appliances. First you need to unpack it, study the instructions and check the completeness. There must be wires for connection, one side is connected to the inverter, on the second there are clamps that are put on the battery terminals.
Approximate prices for installation by specialists
It is difficult to specify the exact cost, as it varies greatly in different regions. First you need to make out what the price depends on:
- Place of installation. The more complex the roof, the more preparatory work will be required and the more they will be asked for work.
- The complexity of the supporting structure. The frame may be simple, or it may require reinforcement of the roof or the use of additional elements.
- Additional work. If a turnkey system is being made, then it will cost more. To reduce the cost, many do some of the work with their own hands.
Many companies, when buying a set of solar panels and accessories from them, give a discount on installation.
If you deal with the average price, then installing solar panels will take about 5000 for each element with a connection. This is the minimum price, in big cities it can be much higher.
Permission to install
Currently, you do not need to take permission to install solar panels if they are installed on your site and do not interfere with neighbors. In multi-storey buildings, when installing on a balcony, you need to contact the architecture so that they confirm that the design will not impair the appearance of the building.
If the system will give surplus to the general network, then you need to call an electrician from the supply organization to make the connection. Failure to do so may result in a fine.
Installing solar panels is not difficult, but you will have to understand the features of the system and choose the best place on the site. It is best to buy a ready-made kit, in which all the parts fit together and you do not need to calculate anything. Also remember that rechargeable batteries are always purchased separately and are not included in the package.